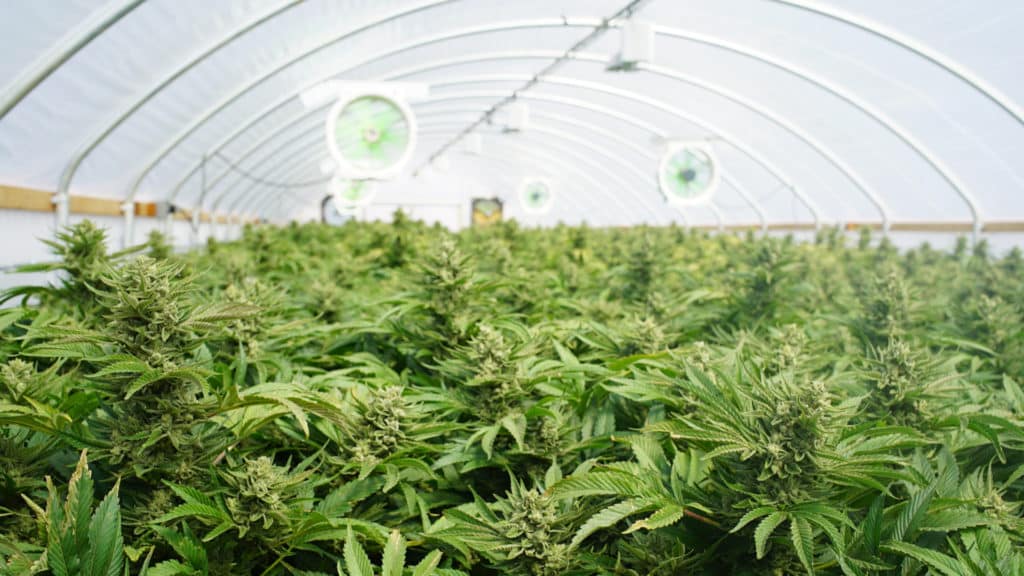
Sometimes new marijuana growers primarily focus on aspects such as soil, strain, and lighting setups, but equally important to the success of their plants is the type of fertilizer they decide to use. Every grower wants their plants to be healthy and productive and choosing the best fertilizer is one big way to accomplish that goal. And, of course, we all want to grow big buds!
When fertilizing cannabis plants, you focus on feeding the soil, not the plants. It’s the living soil that determines a plant’s success. Yes, light and water are critical elements, but what goes into the soil will predict the outcome of the end product. Whether you want to make your own marijuana fertilizer or are simply looking for guidance in what to buy at the grow store, we’ve got the information you need to get started.
Organic Marijuana Nutrients
Healthy cannabis plants require marijuana fertilizer with three elements for strong roots and high flower yields: nitrogen (N), phosphorus (P), and potassium (K). This combination of elements will often be represented on packaging as a single entity, NPK. So, if you’ve ever wondered what NPK stands for when nutrient shopping at your local grow store, now you know. Nitrogen is vital for leaf growth, potassium facilitates the development of flowers, and phosphorus contributes to root and bud growth. Together, these are the essential nutrients to grow weed.
However, NPK nutrients aren’t the only ingredients found in weed fertilizer. Marijuana plant food also contains micronutrients such as calcium, magnesium, sulfur, and several others. While these nutrients for growing weed aid specific growth processes, they are not as crucial as the three core nutrients, NPK, which are the best nutrients for growing weed. Let’s explore what each of these macronutrients provides the plant:
Nitrogen
Nitrogen is essential to any organic lifeform on earth. Not only is it a vital factor for the chlorophyll production that spurs photosynthesis, but it’s an integral component of amino acids, which are the building blocks in all proteins.
Cannabis plants require nitrogen throughout the entirety of their life cycle. Just as humans require adequate protein as an energy source to maintain healthy muscle mass, plants need it to form strong roots, stalks, branches, and leaves. Without sufficient nitrogen, cannabis plants will wither away and simply not be able to support growth.
Spotting a nitrogen deficiency is relatively easy once you know what to look for. It’s common for leaves to turn yellow and fall off the plant. However, this is considered more normal for lower leaves as they are dying off to save energy for the tops of the plants to grow. Therefore, when the leaves receiving the most light at the top of the plant begin to yellow, it could signify a nitrogen deficiency.
Phosphorus
The second of the NPK nutrients is phosphorus. This nutrient is responsible for strengthening a plant’s structure by creating strong roots and buds. It is also required for photosynthesis, metabolism, and the uptake of additional nutrients. Essentially, phosphorus helps a plant reach its fullest potential and achieve its genetic integrity. While necessary during the entire life cycle, phosphorus does its best work during the flowering stage. Cannabis plants with adequate phosphorus levels will be strong, sturdy, and vibrant with a solid root system.
Without phosphorus, a plant cannot produce flowers and will likely be stunted in growth. Early signs of deficiency look like a reddish-purple color spreading throughout the leaf’s veins, and the leaves may begin to turn gray, blue, or a deep shade of green before eventually turning yellow and brittle. Additionally, plants with inadequate phosphorus levels are more susceptible to plant diseases and pests.
Potassium
Potassium is kind of like the immune system of the plant. Cannabis demands extra doses of this valuable nutrient during its flowering phase to produce chunky, well-developed buds. In addition to increasing the size of the buds, potassium protects the plant from infection and disease, helps to use water efficiently, and strengthens plant tissue.
Much like nitrogen and phosphorus, potassium is known as a mobile nutrient. This means it can be taken from old-growth and redirected towards the newer growth. This is why deficiencies will show on the oldest growth first, where the leaves will begin to yellow at the tips until they eventually turn brown and crumble. As a result, stems will weaken, and the overall yield will be much less than it would have been with proper nutrition.
Store-Bought vs. Homemade Fertilizer
Asking a room full of growers if you should use store-bought or homemade fertilizer will rile up the crowd just as much as asking if indoor or outdoor weed is better. The truth is, they can both produce incredible harvests when used correctly. Even the best grow-store nutrient lines can destroy a plant if measured inaccurately or applied incorrectly. Whichever method you choose, here are some products and ingredients to consider in your growing endeavor.
Popular Options in the Grow Store
The type of fertilizer you use depends on your growing medium. You wouldn’t want to use soil fertilizer in a hydroponic setup, or vice versa. For this reason, we’ve broken down our recommendations into the following categories:
Soil Marijuana Fertilizers
- TeraKashi: If you’ve never heard of bokashi, your plants are missing out. Bokashi is fermented organic matter made by adding fermented bran, rice, or wheat to a compost collection. You can make this at home, but it can be a time-consuming and tedious process unless you enjoy home composting. TeraKashi is an organic bokashi fertilizer that you can buy online and add directly to your soil. By introducing antioxidants and minerals into the soil mix, TeraKashi breaks down nutrients that the plants cannot absorb, allowing them to grow bigger and produce higher yields.
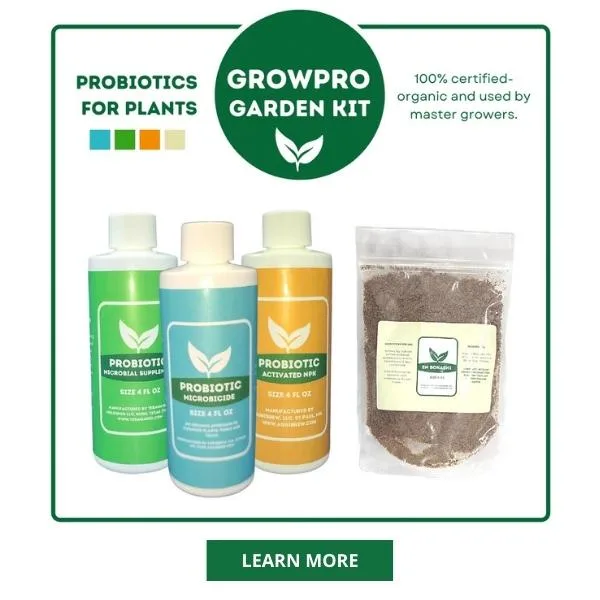
- TeraGanix’s EM-1: In addition to nutrients and minerals, plants need the valuable microorganisms found in soil. Sometimes, even pre-mixed potting soil doesn’t contain diverse compounds, and an additional supplement will be highly beneficial. Products like TeraGanix’s EM-1 do just that by increasing the number and diversity of microbes in the soil. This improves the soil structure and helps the nutrient cycling process and improves water absorption.
- Flower Power: This fertilizer works well for an all-around mixture of the key nutrients your plants need. Flower Power ensures that your marijuana plants will get the three main nutrients: NPK. While all three of these nutrients are always necessary, they are required by your marijuana plant in different ratios and quantities, depending on the phase of growth. Flower Power has a watering and feeding schedule included with the product, so refer to that for any scheduling questions you might have.
- Fox Farms Trio: Fox Farms lets the grower feed their marijuana plants without having to worry about anything else. Fox Farms includes everything your plants will need and is one of the best products for inexperienced marijuana growers. No matter what strain of marijuana you decide to grow, Fox Farms should do the trick. The trio of Fox Farms products includes Grow Big, Tiger Bloom, and Big Bloom. You will want to use them all and follow the instructions that come with them.
- Perlite & Vermiculite: Perlite and vermiculite work well as fertilizers and can be found just about anywhere you can buy garden supplies. They are porous materials, meaning they allow more oxygen and water flow to move through the soil, while also increasing nutrient and moisture retention. Perlite and vermiculite help soil media avoid clumping into chunks as they dry out. They also naturally house minerals including magnesium, calcium, and potassium — all of which marijuana plants will use. When mixed with the soil, these minerals will eventually seep into the entire grow medium.
- Dyna-Gro: This product works well for those who want to get the most bang for their buck. Dyna-Gro has several options available, depending on the life cycle phase your marijuana plant is in. This includes foliage-pro and other bloom fertilizers. Use the foliage-pro product during the vegetative phase of your plant’s growth, and the bloom product during the flowering phase. Following the instructions on the bottle should keep your feeding schedule and proportions in check, and using Dyna-Gro throughout the different stages of your marijuana plants’ life will help them do just fine.
Hydroponics Fertilizers
- General Hydroponics Flora Series Nutrient Trio: This works not only in hydroponics systems but also in coco coir or soil media. You can get everything you need in this package, including a pH testing kit along with the marijuana fertilizer itself. This is extremely important when feeding your plants, especially when you’re growing hydroponically.
- General Hydroponics FloraDuo: Made by the same company, FloraDuo is the 2-bottle version of the above system. The first bottle has plenty of nitrogen for the first half of your plant’s life, and the second bottle is higher in phosphorus and potassium to help the bud growth during the flowering phase. It works well for beginners because the instructions are quite clear. The key is to always maintain a pH level of between 5.5 and 6.5 in your water, and you will see the positive results of this product.
- Botanicare Nutrition: Botanicare supplements include Base, Bloom, and Grow and cover all of the necessary nutrients that your marijuana plants will need throughout their lifetime. This is a great product for people who like to tweak and change things themselves since there is plenty of flexibility for adjusting the levels of calcium and nitrogen. This is not recommended for beginners.
- Advanced Nutrients: This brand is pricier but recommended by those who use it. You can buy Grow, Micro, and Bloom from them for the best results. That being said, this top-shelf product is expensive but not necessarily worth paying so much extra for. The less expensive products listed above will likely do the job just fine.
Coco Coir Fertilizers
- Canna Coco A + B and Cal-Mag: Available across the internet and in some grow stores, Canna Coco products work really well for coco coir grow setups. This is an Amsterdam-based company that has nutrients specifically designed for marijuana, so you know that their products will work for your precious marijuana plants.
- Fox Farms Nutrient Trio for Hydroponics: The Fox Farms Nutrient Trio for hydroponics can work well for coco coir, especially for preventing calcium and magnesium deficiencies. Grow Big, Tiger Bloom, and Big Bloom are the products you are going to want for your coco coir setup. Stick to the instructions listed on the package.
Ingredients for DIY Marijuana Fertilizer
We’ve talked about the essential nutrients—NPK—but there are plenty of other ingredients that can be used to ramp up yield and feed your pot plants.
- Human Urine: Yes, you read that correctly: your urine can be used as a fertilizer! Before you start urinating on your marijuana plants, know that full strength can actually kill your plants. Dilute one full urination with a gallon of water and put that directly on your plants right away (before ammonia starts forming). Human urine works because it has lots of nitrogen. Nitrogen is a crucial component for marijuana plants to grow foliage in its early and vegetative stages, so this turns out to be an extremely cost-effective way of getting your plants the nitrogen they need.
- Chicken Manure: You can either buy chicken manure compost or make your own, but if you purchase it, make sure it is organic slow-release chicken manure. This is known to lead to higher yields, and if you have chickens, it is also highly cost-effective. Your plants will love getting nutrients from chicken manure composts.
- Wood Ash & Lime: If you are growing marijuana plants outdoors and you know that the local soil is acidic, wood ash will be a very useful tool for you. It helps offset the acidity of the soil. You should feed it to your plants by mixing it with water: one shovel of wood ash for every five gallons of water should do the trick. If wood ash is not doable for you, lime, found in garden centers, will also work.
- Vinegar & Baking Soda: Marijuana plants really love carbon dioxide, and generally, the more carbon dioxide is available in the air, the healthier the plants will be. White vinegar can be used to produce carbon dioxide. All you have to do is to get a liter-sized bowl, add baking soda, and then drip white vinegar into it one at a time, once every two minutes or so. This combination will release carbon dioxide into the air in large proportions.
- Compost: Just as it naturally happens in the wild, animal poop and leftover organic products (vegetable and fruit scraps, among others) go back into the earth and provide the plants on the ground with the nutrients they need to thrive. The key to making your own compost is to turn it often so the “ingredients” blend and mix on a daily basis. Compost takes time to prepare (allow it approximately three months to turn into rich, nutrient-filled soil for growing plants), but the payoff is huge.
Make Your Own Marijuana Fertilizer in 5 Easy Steps
Making your own fertilizer is not for the faint of heart, but it can save you some money and provide valuable knowledge about assessing plant needs. To make your own fertilizer, follow these five easy steps. This recipe will yield 100 liters.
Step 1: Preparation
Gather all of your supplies and make sure all tools and containers are sterilized. You will need the following items:
- Marijuana fertilizer ingredients (such as nitrogen, phosphorus, and potassium)
- Measuring cups
- 10mL syringe
- EC meter
- pH meter
- pH Up and pH Down
- Water tank or reservoir
When deciding what kind of nutrients you want to include in your fertilizer, remember that the most important basics are NPK. After that, you can begin to experiment with varying ratios of any of the ingredients noted in the above section.
Step 2: Mixing the Ingredients
Fill the water reservoir with lukewarm water around 72 degrees Fahrenheit. Add your ingredients to the water one at a time, and mix thoroughly. Be sure to write down how much of each ingredient you use, and always track additional ingredients should you add more. Without proper tracking, it’s impossible to know if this formula is a winner.
It’s highly recommended that you use a circulation pump inside of your reservoir. It keeps the water from settling and accumulating any films or residues and is more efficient than hand-mixing nutrients.
Step 3: Adjusting the EC Level
Electric conductivity (EC) measures the water’s ability to transport electricity. It’s dependent on the water’s mineral content, and will result in varying numbers. If water has an abundance of minerals, it will behave similar to copper wire, whereas distilled water will have no conductivity. Knowing your water’s EC level helps you understand just how much mineral content is in your water, so you know whether or not to add more nutrients, or if you need to water it down.
Using your EC meter, check the mineral content of your water. Young plants require an EC level of roughly 1.5, while mature plants like an EC level of 2.5 or higher. Obtaining the optimum EC level is a trial and error process, as factors like natural mineral content in your water supply play a large role in the reading. By using a graduated scale, you will be able to closely monitor the results.
For example, every third or fourth day increase the EC by 0.1, and monitor the plant health. Look for signs of discoloration, distortion of the leaves, or other noticeable changes to the plant structure. If you see signs that indicate your EC level increased too rapidly, go back to the exact measurements you used in the prior feeding. Sometimes an extra watering is helpful to flush out the added nutrients and help the plants recover quicker.
If you try to increase the EC levels and the plants have a negative reaction again, you will know you’ve reached the maximum level for this harvest and can revert back to the previous level that caused no harm. Because the water supply varies from region to region and even city to city, there is no exact recipe for the perfect EC level. Keeping an accurate log of your recipes and results is your best chance at finding the right formula for your weed plants.
Step 4: Adjusting the pH Level
Now that the feeding solution is mixed properly, you will need to check the pH values and adjust if necessary. These values should lie between 5.5 and 5.8. Most often, you will be using your bottle of pH Down, however, keep a bottle of pH Up handy in the event that you accidentally decrease the pH too much. Start with a very small amount and mix thoroughly before using your pH meter to gauge the level.
Once you get a better idea of how much it takes to reach the ideal pH level, write it down in your growing log so you can add it in one shot the next time.
Step 5: Adjusting the Temperature
While you’ve been mixing nutrients and adjusting levels, the temperature of your water has likely dropped from the ideal 72 degrees Fahrenheit. To keep your water temperature consistent, consider using an aquarium heater.
After your marijuana fertilizer is prepped and the water temperature is ideal, let the batch rest for a few minutes while the circulation pump ensures an evenly mixed batch. Then, feed your plants and watch them thrive. Be sure to monitor any results over the coming hours and days.
Fertilizer Guidance for Each Growth Stage
Choosing the best fertilizer for marijuana can be daunting for both the experienced cultivator and the novice. If you don’t use enough or have the wrong ingredients, your marijuana plants won’t grow to their full potential. However, if you use too much, your plants will likely develop “nutrient burn,” indicated by yellow, burnt tips on the leaves.
While some slight variations may occur, there are some standardized guidelines for what your plants need during their early growth, vegetative stage, and flowering.
Early Growth
Early growth is defined as seedlings or fresh cuttings. This is when your plants are just beginning to grow, reaching for light, and developing their fragile roots. During this time, the plants can easily thrive off of the nutrients from the seed and the minor amounts found in the peat plugs or potting soil. However, too much too soon will harm these young plants. Generally, do not start feeding plants until they have at least 2-3 true leaves.
Vegetative Stage
The vegetative stage lasts anywhere from four to twelve weeks. During this time, your plants are going to require an NPK ratio of roughly 3:1:1. This ratio is defined as 3% nitrogen, 1% phosphorus, and 1% potassium. Keep in mind that the soil you are using is likely rich in nitrogen, so you may not necessarily want to feed with fertilizer at this exact NPK ratio. Because of this, you may want to use a 1:1:1 NPK marijuana fertilizer as a safety precaution.
Flowering Stage
The flowering stage is divided between early bloom and full bloom. The first sign of flowering is the development of pistils. During the early bloom stage, adjust the NPK ratio to 1:3:2. You’ll recall that phosphorus is critical during this time to strengthen the plant and develop strong roots and buds to support the mature plants. This adjustment prepares the plant to produce super dense, chunky buds bursting with trichomes.
During late bloom, adjust the NPK ratio to 0:3:3. The plant will utilize the remaining nitrogen present, but its need for potassium increases. This is when anything that might go wrong with the plant could destroy the crop, and potassium helps ensure a healthy harvest with an optimum yield.
Keep in mind that these are generalized guidelines. When using commercial nutrients, be sure to follow the directions provided. Not all nutrients are created equal, and some products suggest a minor adjustment to ratios as often as every week. Be sure to keep a log of your plant care to include feeding schedules, ratios, and how the plants are responding to the nutrients. As you become more experienced with cultivation, you will begin to see which strains respond best to a particular fertilizer, and you’ll be able to quickly spot and treat deficiencies.
Indoor vs. Outdoor Needs
Nutrient and fertilizer requirements vary based on growing conditions. For example, while indoor and outdoor cannabis needs supplementation, the exact formula may differ. If you choose to grow hydroponically indoors, you will need to up your nutrient feeding schedules because they are cycled much quicker than a soil system.
Even when growing outdoors, nutrient needs vary depending on where you plant your pot. In the ground, containers, or raised beds all come with slightly different requirements. This is because of the diversity in soil drainage for different types of grow media. It’s important to know the percolation rate of your soil to adjust your feed ratios accordingly. Fortunately, most store-bought fertilizers will provide an instructional guide where you can match up your grow media with your grow set up.
How Often Should I Feed My Weed Plants?
As soon as you begin feeding your plants in the vegetative stage, use a marijuana fertilizer every other time you water. Continue to follow directions as advised on the packaging to determine the proper ratios week over week.
When your plants begin to flower, follow the same feeding schedule every other watering. But, be sure to adjust the ratios to accommodate the new growth cycle.
Monitoring the trichomes on the plant will help you determine how close you are to harvest. This is when you prepare to flush. Flushing your plants is when you use only water to wash out any remaining nutrients in the soil. If you don’t flush your plants to rid the excess salts and nutrients, the final product can taste bitter and harsh to smoke.
If you grow in soil, you’ll want to flush one to two weeks before harvest. If you use coco, flush within the last week. For all hydroponic grows, flushing is only necessary for one to two days before you harvest.
Additional Readings on Cultivation
The Weed Blog is a comprehensive source to find reviews of specific top strains of cannabis and online news resources regarding the legalization of marijuana. We are committed to helping you find valuable information about cannabis on our website. With marijuana law constantly changing, learn about the latest legislation from our website and what you can do to help. Otherwise, consider these other top tier articles regarding cannabis cultivation:
How to Organize the Watering Process When Growing Marijuana